
This post was first published in 2021
I previously talked about a solo Test of Honour narrative campaign here. The basic principle is that the AI for the opponents is very simple, and events on the table-top, coupled with occasional use of random events, form the narrative that holds it all together. What follows is an account of the second part of the campaign, the first part is here. The setting is pretty solidly historical (so no ninja etc), and occurs on the border between Mino and Owari provinces in 1561. I’ve added some notes that may be useful for anyone planning their own campaign.
Chapter 2 – The Kiso River
- The Palanquin

Toranosuke and Iemon travel to the border between Owari and Mino and meet up with Genzaburō. The 3 work transporting goods along the river, but after a while Genzaburō is lured back to the criminal life. He accepts a job to transport some stolen matchlock guns to a bushi called Tomoda. Given the location, Tomoda was probably a retainer of Tsubauchi Torisada, one of the local kokujin. Genzaburō comes up with the foolproof scheme of putting the guns in a palanquin and pretending to be transporting a high ranking official. On the final part of the overland route, they are attacked by a gang of robbers. Toranosuke and Iemon make quick work of the leaders, and the rest of the robbers flee. The guns are safely delivered to Tomoda-dono, and the smugglers are paid.

For this game I added a ‘seeker’ variant to the AI. These act much the same way, except instead of moving towards nearest enemy, they move towards the nearest objective. If they collect the objective then they will always try and move off table (or wherever they’re supposed to go) as a priority.
- The raid

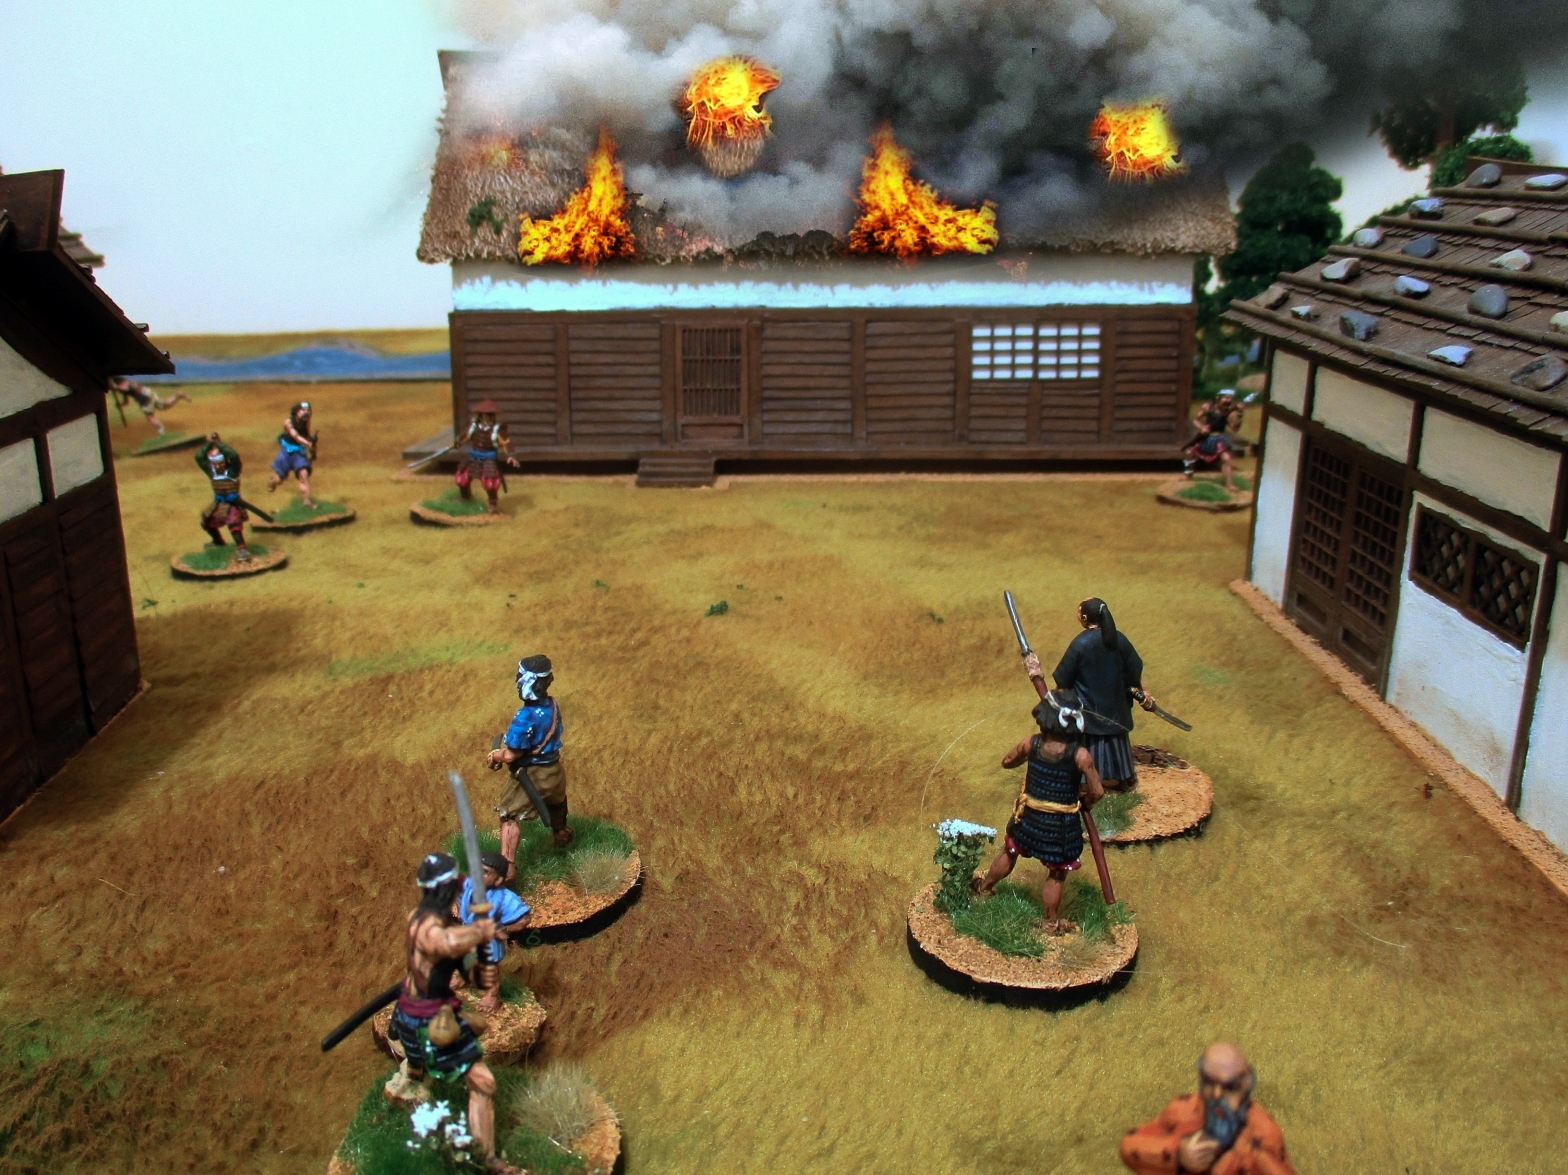
The three return to the legitimate business of transporting goods. But one evening there is a commotion in the village. Cries of panic ring out, the village is under attack!

Toranosuke, Iemon and Genzaburō quickly get their crew together and rush to save the villagers. The 3 engage the raiders, while the rest of the crew try and lead the villagers to safety. The stiff resistance gives the robbers pause and, during a break in the fighting, most of the villagers are saved. When the raiders depart, part of the village is burning, some villagers are dead and two are missing.
The village leaders meet and decide to protest to the local ji-zamurai Ishidake Kazuyoshi, about the lack of protection. Toranosuke volunteers to handle the meeting.
- The Ji-zamurai’s steward.
Toranosuke and Iemon travel to meet the steward of the ji-zamurai responsible for the village to ask for greater protection against attack by robbers. Genzaburō, ever cautious, takes some men and follows the two in case something goes amiss. The interview with the steward and his secretary becomes heated. The ji-zamurai’s men stand up and draw swords, Toranosuke is unarmed, and Iemon has only a concealed dagger.…
Toranosuke tries to disarm the steward, Morinari, but is pushed away. The other man strikes at Iemon injuring him, but Iemon is able to stab the man with his concealed dagger. Morinari is briefly distracted and Toranosuke wrestles him to the floor, stunning him. More men enter the house. Toranosuke grabs Morinari’s sword and flees outside into the rain, where Genzaburō and the crew rush to help.
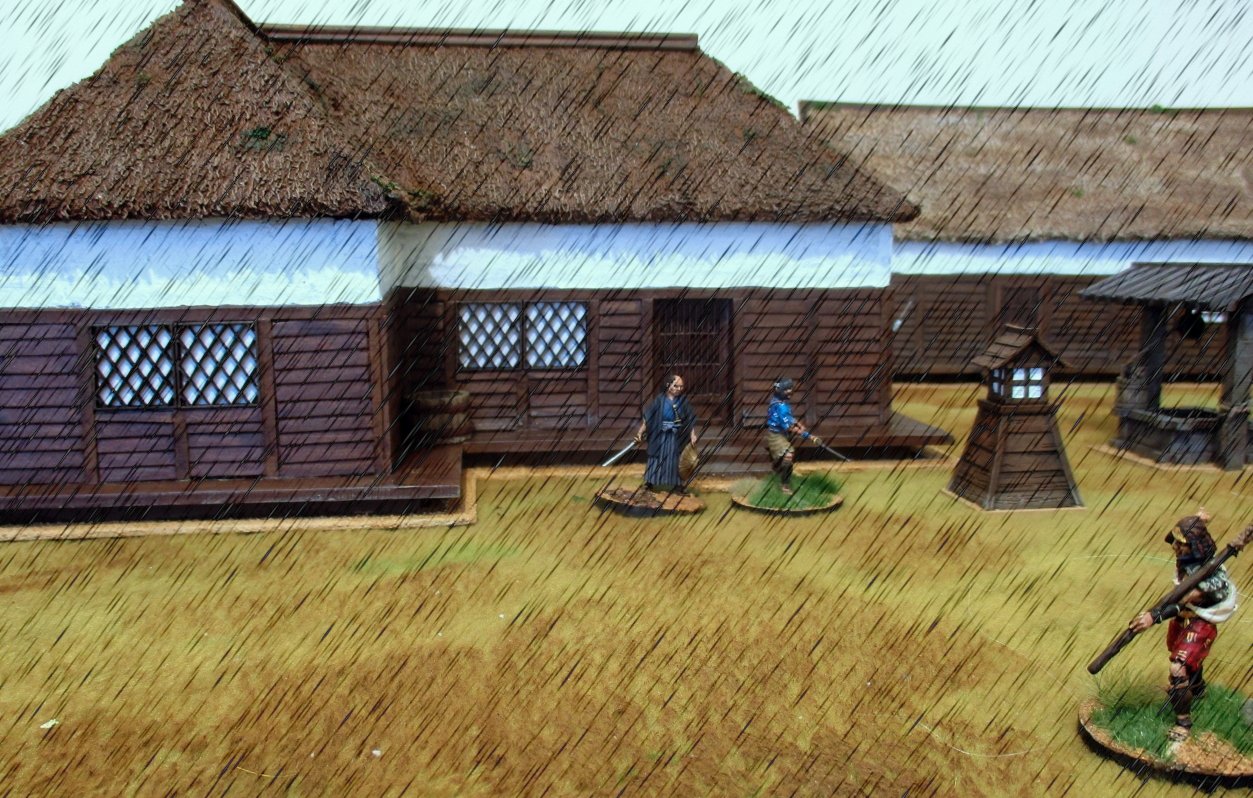
Morinari comes to, grabs a sword from one of the men and pursues Toranosuke outside. A running fight ensues, with Toranosuke and the rest forced back. Toranosuke cuts down one of the pursuers, causing Morinari and his men to shrink back. Toranosuke and the others flee back toward their village. Why did Morinari try and kill Toranosuke? What will the villagers decide to do next?

I used a weather generator from an RPG for this one. Test of Honour has weather rules, and I used the same -1 to evade rules here. But in a solo campaign you could decide whatever effect you want before the game. The interview was handled with an RPG reaction table, and went catastrophically bad. You could just use a 2d6 range, maybe giving the main character a test of wits or honour to get a positive bonus. The outcome here was another unexpected twist, I was assuming the story would lead to joining up with the Ji-zamurai’s men to hunt down the bandits.
- The meeting
The village leaders hold a meeting to decide what to do. There are 3 options.
Make weapons and train the villagers to fight to resist the Ishidake.
Seek protection from Tsubauchi Torisada via Tomoda.
Toranosuke and Iemon leave the village.
Toranosuke argues for seeking protection from Tsubauchi, and offers to meet Tomoda to discuss it. The villagers reject this out of hand, and argue between the other two courses of action. The villagers begin to lean towards those who argue that Toranosuke was responsible for provoking the attack at the meeting. As the argument becomes heated, Toranosuke decides to leave the village.
The next morning, Toranosuke and Iemon prepare to leave. Genzaburō, however, decides to stay. The two take their leave of Genzaburō and part on good terms. They plan to travel further up the Kiso river and possibly return to Owari. But Toranosuke still burns with thoughts of vengeance against Morinari.
This meeting was again handled by an RPG reaction table. I gave Toranosuke a Test of Wits to get a bonus modifier for his preferred course of action. This failed spectacularly and turned the villagers against him. I was a bit gutted to lose Genzaburō, he’d developed into a clever character with useful leadership skills. I don’t pre-prepare skill cards for the games, I just grab some at random, so I don’t bother with restrictions on who can have what card. Drawing cards can help fill out a character’s personality. So Genzaburō had a decent wits score and I drew a leadership card for him, so he became the leader of his boat crew. I’m hoping to hook up with him again later in the campaign.
- The Rōnin
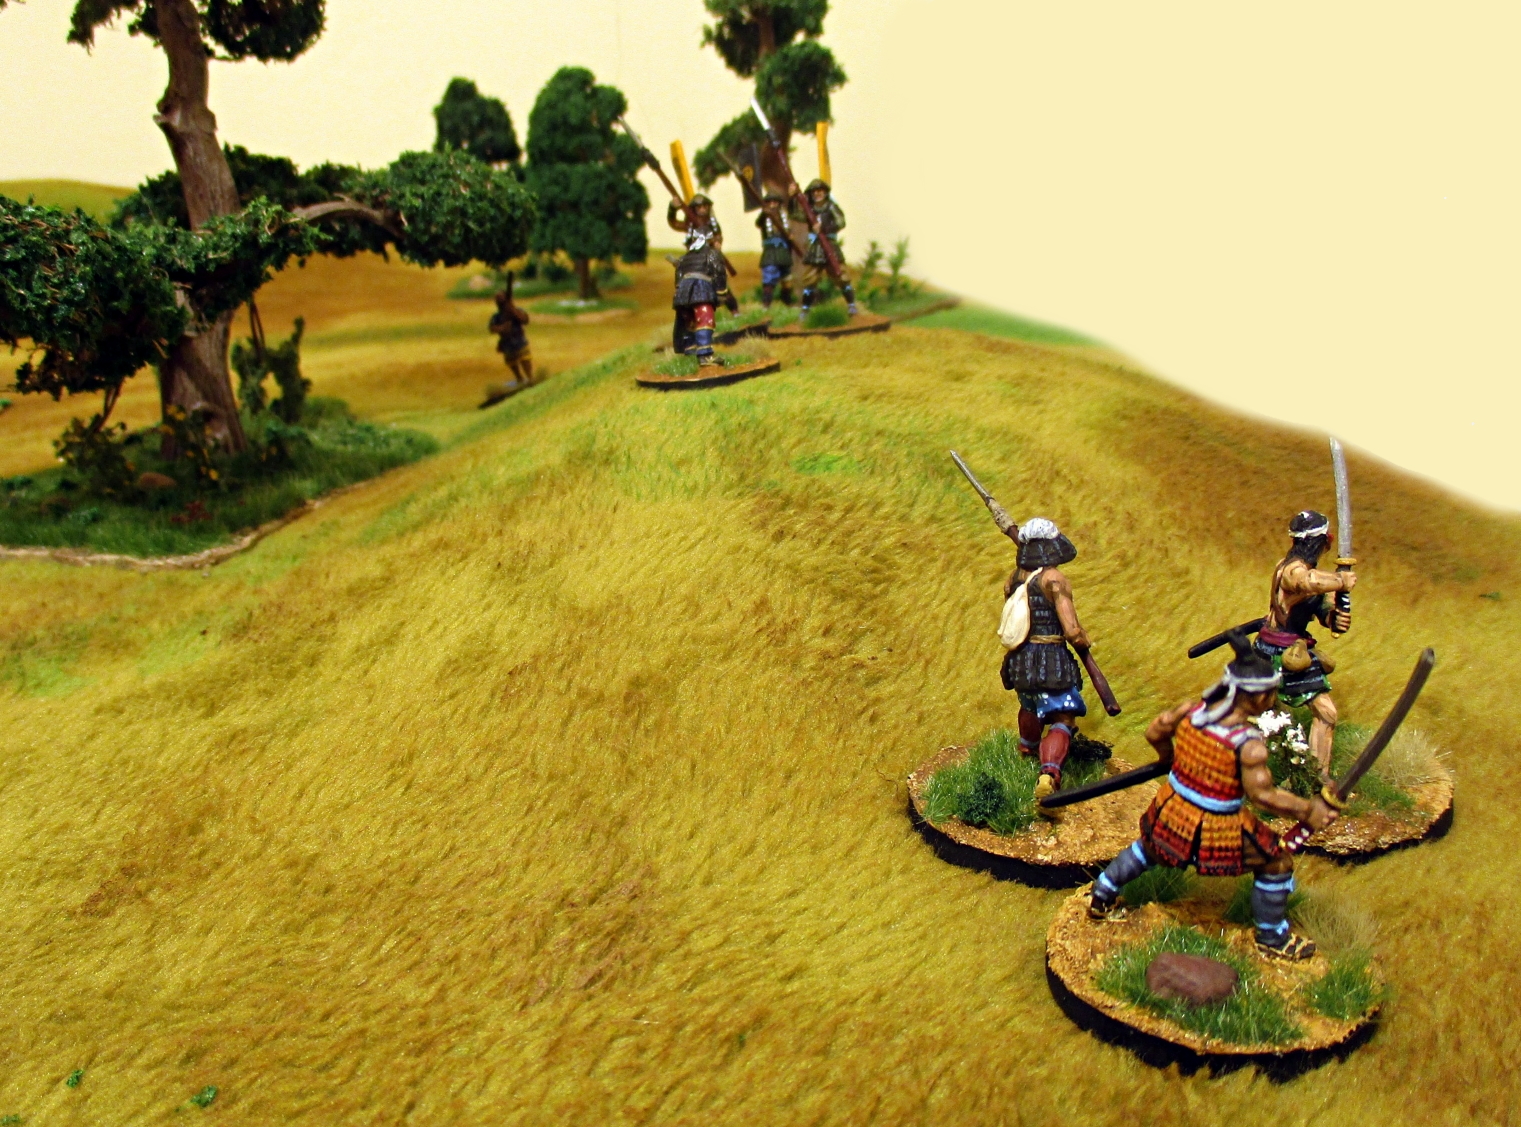
The two travellers meet a group of 4 rōnin, travelling to join the fighting upriver. Toranosuke decides to accompany them, he could use the money, and the fighting probably won’t go on for too long. The 6 of them join a Saitō force under Adachi Rokubei attacking the forces of Oda Nobunaga, who has crossed the Kiso river into Mino province.
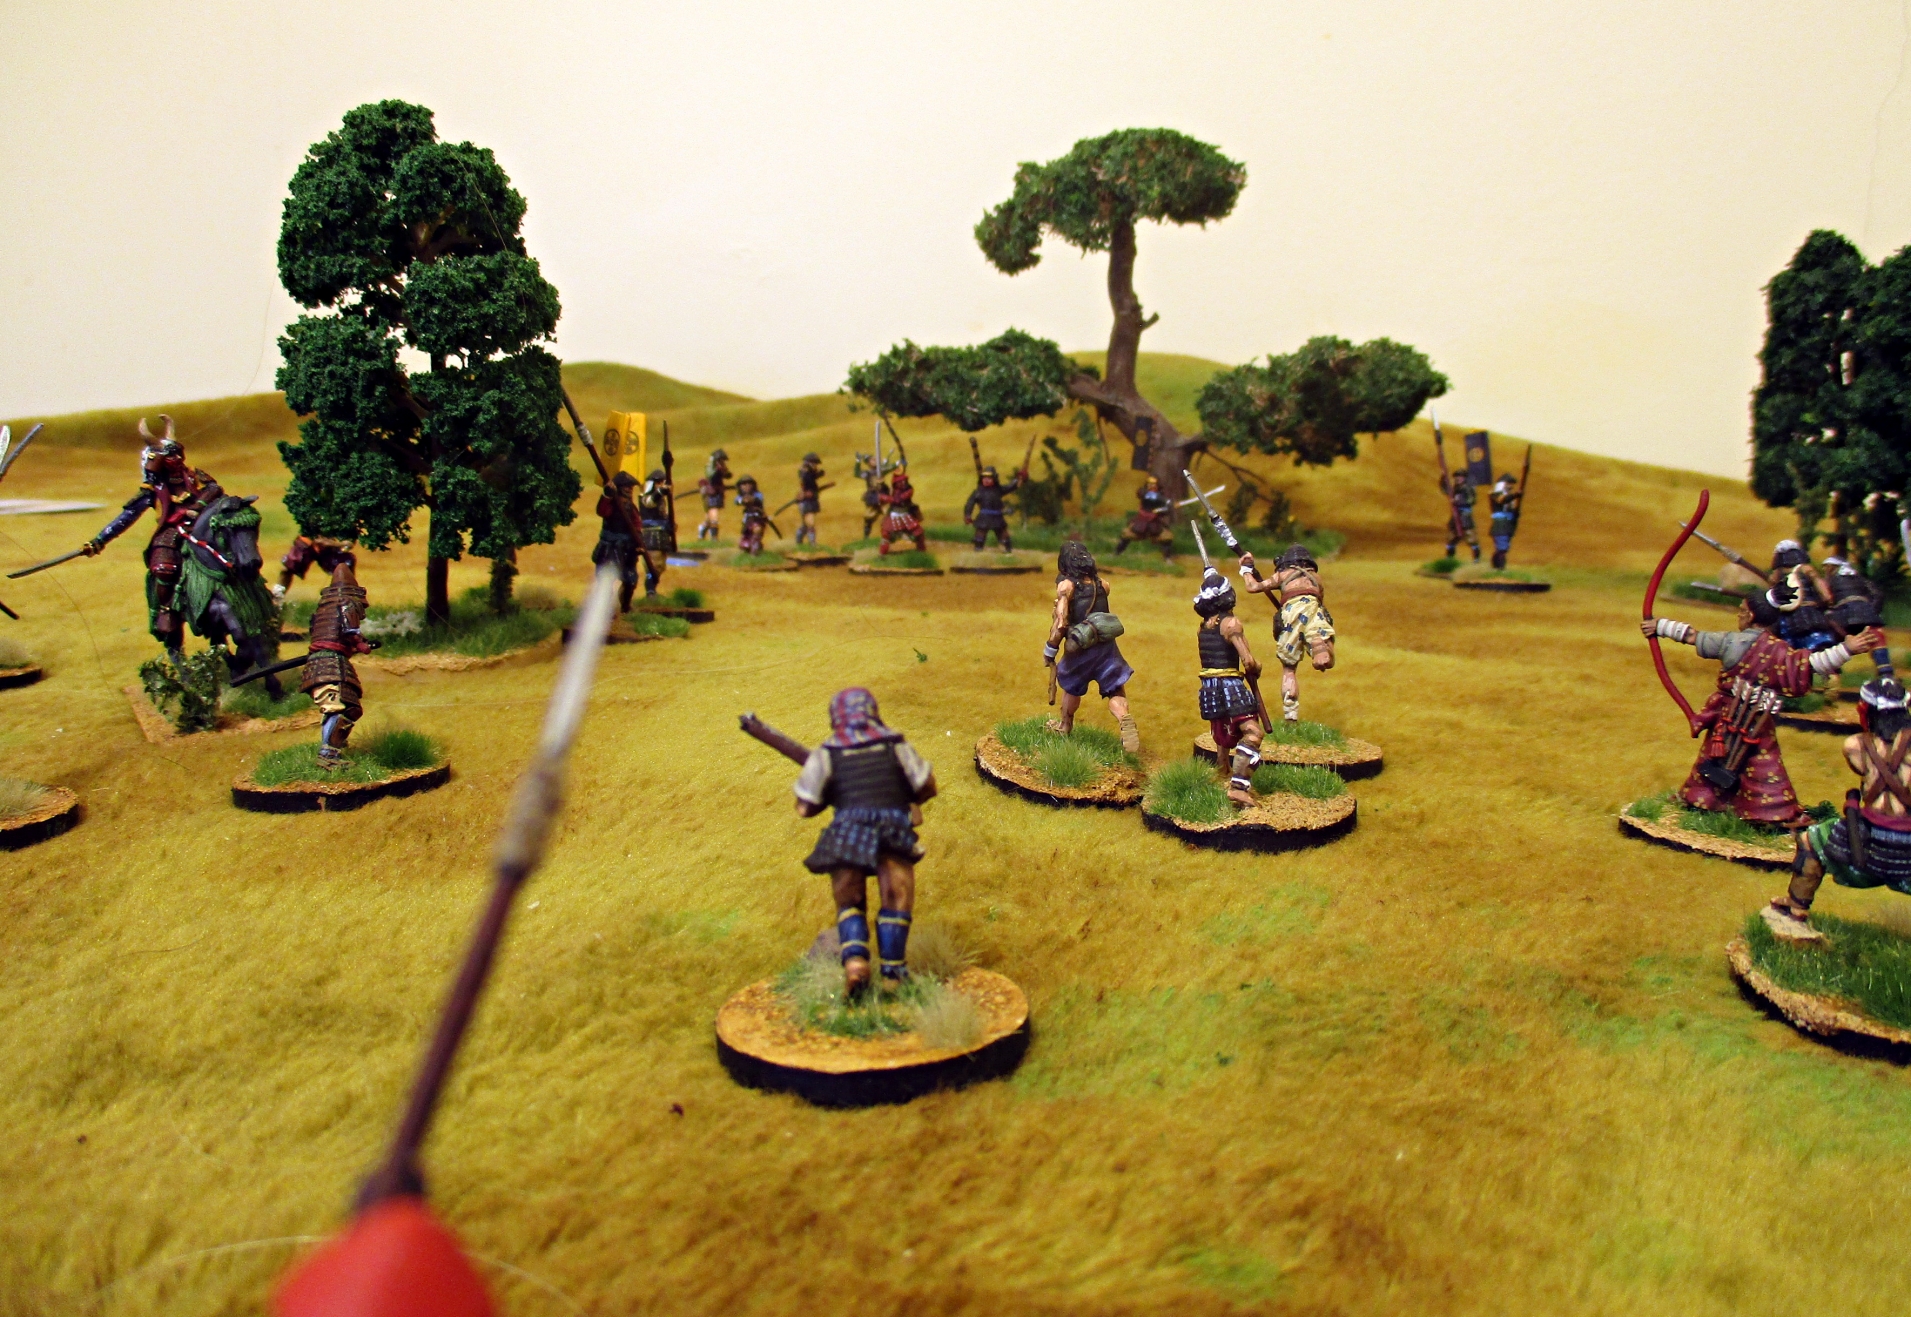
Toranosuke and the rōnin’s contingent undertakes a scouting expedition, and run into an Oda force. It is Toranosuke’s first experience of battle, and he initially hangs back on the flank. The Saitō leader rushes forward, some of the rōnin charge recklessly in search of recognition and reward. The two forces clash amidst the flying arrows and sounds of gunshots. The Oda commander is cut down by the Saitō commander, Toranosuke takes the opportunity to rush forward and engage an enemy bushi. After a brief exchange, Toranosuke manages to overcome the bushi, Iemon rushes forward to take the head.

The Oda retreat, but rally briefly against a rash pursuit. The Saitō leader is wounded, but the last of the Oda commanders is overcome by some ashigaru and the Oda flee. All of the rōnin have survived, and Toranosuke and Iemon scavenge some armour and go to present the head for a pay bonus.
I made a few changes for ToH here. One was to give anyone with an action remaining a free avoid action against missile fire. So a successful avoid doesn’t use an action or a cautious move marker. This is to model how difficult I think it would be to hit single moving targets in a skirmish. When a character is out of actions, it represents them staying still long enough for an archer/gunner to get a decent shot The other introduction was heavy armour, which was just a case of reducing move by 1 and reducing damage taken by 1. This made heavy-armoured bushi hard to kill in one blow, and in most of the cases here they were lightly wounded first, before being cut down, which was the kind of effect I was looking for. Of course, this would unbalance the game in terms of points values normally, but in a solo game, it doesn’t matter.

- The Battle of Moribe


The Saitō army attack the Oda at Moribe. As their contingent clashes with the enemy, Toranosuke and the rōnin try and outflank the enemy. An Oda bushi lunges at Toranosuke, wounding him. As Toranosuke reels back the rōnin attack the bushi distracting him enough for Iemon to spring forward and deliver a killing blow with his spear. But then a gunshot rings out and Iemon falls dead, the rōnin flinch back. Toranosuke rushes forward to engage a group of ashigaru and defend the fallen Iemon’s body.
Toranosuke forces back the ashigaru supported by the rōnin. He sees the musketeer who shot Iemon and cuts him down. Toranosuke and the rōnin fall back to join the others, but elsewhere it’s clear the battle is going badly for the Saitō. In a brief lull in the fighting, Toranosuke’s contingent falls back to rally around Adachi.
The Battle of Moribe was a real event won by the Oda, and to represent the battle going on around the action here, I added a special token to the activation cup. If the Oda draw it they get an honour card, if the Saitō draw it they take a dishonour card. It was really sad to lose Iemon, the only other survivor of the first scenario, he’d saved Toranosuke several times. Losing Iemon felt more like losing an RPG character than a skirmish game figure, which is no bad thing. If you get attached to your characters, then the narrative is going right. I’d changed the after-battle tables to have separate ones for the supporting characters, with a chance of being killed. So the main character is pretty much un-killable as in the main rules, but supporting characters, while still very likely to survive, are a bit more fragile.
- The Battle of Moribe continued

The fighting rages but the Oda continue to force back the Saitō. Toranosuke and some other bushi try and force their way through the Oda line. The Oda line give, but does not break. A wave of panic sweeps through the Saitō as the news that Adachi has been slain by an Oda bushi spreads. Somehow, in the chaos, Toranosuke and one of the rōnin, Muneyori, escape, the other 3 rōnin lie dead on the field. Toranosuke and Muneyori head back towards Saitō territory and rest up for the next action.
I used two special tokens this time to represent the battle going against the Saitō. In the actual battle, Adachi was slain by Maeda Toshiie, who would go on to great things under Nobunaga and Hideyoshi. Muneyori hasn’t developed much of a character yet, but hopefully that’ll change in the next few scenarios.
- Jūshijō
Ten days after the debacle at Moribe, Toranosuke, Muneyori and the Saitō army are at the village of Jūshijō as the Oda launch a morning attack.

The first Oda assault is beaten back by the Saitō, Toranosuke defeats an enemy bushi.

Then, from behind the houses, Saitō troops fall back. A Saitō commander has panicked and his men fall back with him. Toranosuke rushes over. Now separated from Muneyori, Toranosuke and an ashigaru are able to overcome the Oda bushi leading this assault. The Oda withdraw.

- Karumi

The Saitō push on to Nobunaga’s position at Karumi. The fighting is sporadic and continues throughout the day. Toranosuke and Muneyori push forward, fortunately bringing them out of the way of the Oda commander, Sassa Narimasa. As evening falls, the two sides separate. The next day the Saitō withdraw.

Toranosuke has become more competent in battle and is developing some leadership abilities. But he is tired of the factionalism within the Saitō, and decides to head back down the river, possibly to head back into Owari to his village. Muneyori decided to stay and try and seek his fortune with the Saitō. Toranosuke isn’t too upset with this, Muneyori had proven himself to be rather unreliable.
Muneyori’s first skill card was a dodge bonus, as was his second. During the battle he was crowded out by followers and unable to get through to attack the enemy. Clearly this marked him out as a cautious fellow. This battle featured the inclusion of the first historical character on the actual table, Sassa Narimasa. I made him a hero and gave him a couple of skill cards. But given how unpredictable combat can be in ToH, this wasn’t unbalancing in any way, and Toranosuke did a good job of keeping out of his way, anyway.
So that’s the second chapter finished. Again, the story took a few unexpected turns, before being anchored on the historical battles. I’ve used RPG resources for random events and encounters, but you could just as easily use the ToH cards themselves. A character card drawn at random, possibly coupled with a skill card or quest card, might spark an idea for an encounter. Decisions can be handled with 2d6, with modifiers for the situation. A scenario chosen at random can provide the basis for the next game. Combining all of them can create the ideas to form the narrative. Above all else, the fundamental property of solo games is there’s only one player. So you never have to feel restricted by doing things ‘by the book,’ after all, it’s not as if your opponent is going to object.
I think it is possible to take a narrative approach to 2-player games. The problem is it gets a bit implausible to have the same 2 bands of figures fighting all the time. Something like the linked scenario campaign in the main ToH rules is great, but would take almost as long to design as to play. The alternative is to let each player develop their own narrative in a similar way to the solo approach but with the other player playing the opponents, alternating games where one player plays a group of ‘Non-Player Characters’ in the other player’s storyline. From time to time, the two players’ bands could meet on the tabletop where their stories could plausibly coincide. This has the added bonus of getting to play a lot of different forces in the other player’s narrative, alongside the one you use as your actual campaign force in your own.
